
DOWNLOAD Beginning iPhone Development with SwiftUI
Beginning iPhone Development with SwiftUI Book Details
Title: Beginning iPhone Development with SwiftUI
Author: Wally Wang
Language: English
No. of pages: 468
Format: PDF, EPUB
Understanding iOS Programming
All programming involves the same task of writing commands for a computer to follow. To learn iOS programming, you need to learn three different skills:
- How to write commands in the Swift programming language
- How to use Apple’s software frameworks
- How to create user interfaces in Xcode You need to write commands in the Swift programming language to make your app do something unique. Then you rely on Apple’s software frameworks to handle common tasks such as detecting touch gestures or accessing the camera. Finally, you use Xcode to design your app’s user interface. You want to rely on Apple’s software frameworks as much as possible because this lets you perform common tasks without writing (and testing) your own Swift code. By relying on Apple’s software frameworks, you can focus solely on the unique features of your app rather than the mundane details of making an app use different hardware features of an iPhone or iPad. Ideally, you want your user interface to look good by adapting to all different
screen sizes such as an iPhone, iPad, or iPod Touch. The user interface lets you display information to the user and retrieve information from the user. The best user interface is one that doesn’t require even thinking about.
Essentially, every iOS app consists of three parts as shown in Figure 1-1:
- Your code to make an app do something useful
- A user interface that you can design visually in Xcode
- Access to hardware features of an iOS device through one or more of Apple’s iOS framework
Designing User Interfaces with SwiftUI
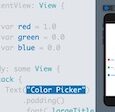
Every app needs a user interface. The basic idea behind SwiftUI is to create a user interface using building blocks known as “views.” A view displays a single item on the user interface such as text, an image, or a button as shown in Beginning iPhone Development with SwiftUI book.
One limitation of SwiftUI is that it can only display a single view on the screen at a time. To get around this limitation, SwiftUI offers something called “stacks.” A stack is considered a single view but lets you combine or stack up to ten additional views. By creating a stack, you can display more than one view on the screen. Stacks can even hold other stacks, essentially letting you display as many views as you want on a single screen.
Placing Views on the User Interface
When you place a single view on a user interface, SwiftUI centers it in the middle of the screen whether that screen is a small iPhone screen or a much larger iPad screen. As
you add more views to your user interface, SwiftUI simply displays those views on top
of each other or side by side, depending on whether you arrange them in a vertical or horizontal stack. However, the more views you add to a user interface, the more crowded neighboring views can appear. To solve this problem, SwiftUI offers several ways to place views on the user interface:
- Use the padding modifier
- Define spacing within a stack
- Use the Spacer
- Define an offset or position location You can use one or more of these different methods to arrange views on the user interface so they appear exactly where you want them. Best of all, these positioning methods work on all user interface views in SwiftUI
